Single sign-on to Google sites using AccountManager
In the first part of this series, we presented how the standard Android online account management framework works and explored how Google account authentication and authorization modules are implemented on Android. In this article we will see how to use the Google credentials stored on the device to log in to Google Web sites automatically. Note that this is different from using public Google API's, which generally only requires putting an authentication token (and possibly an API key) in a request header, and is quite well supported by the Google APIs Client Library. First, some words on what motivated this whole exercise (may include some ranting, feel free to skip to the next section).
Android developer console API: DIY
Originally developed by Timelappse, and now open source, Andlytics does all the things mentioned above, and more (and if you need yet another feature, consider contributing). So how does it manage to do all of this without an API? Through blood, sweat and a lot of protocol
But there is a bright side to all this: Developer Console v2. It was announced at this year's Google I/O to much applause, but was only made universally available a couple of weeks ago (sound familiar?). It is a work in progress, but is showing promise. And the best part: it uses perfectly readable (if a bit heavy on
null's) JSON to transport data! Naturally, there was much rejoicing at the Andlytics Github project. It was unanimously decided that the sooner we obliterate all traces of GWT, the better, and the next version should use the v2 console 'API'. Deciphering the protocol didn't take long, but it turned out that while to log in to the v1 console all you needed was a ClientLogin (see the next section for an explanation) token straight out of Android's AccountManger, the new one was not so forgiving and the login flow was somewhat more complex. Asking the user for their password and using it to login was obviously doable, but no one would like that, so we needed to figure out how to log in using the Google credentials already cached on the device. Android browser and Chrome are able to automatically log you in to the developer console without requiring your password, so it was clearly possible. The process is not really documented though, and that prompted this (maybe a bit too wide-cast) investigation. Which finally leads us to the topic of this post: to show how to use cached Google account credentials for single sign-on. Let's first see what standard ways are available to authenticate to Google's public services and API's.Google services authentication and authorization
ClientLogin
The oldest and most widely used till now authorization protocol for installed applications is ClientLogin. It assumes the application has access to the user's account name and password and lets you get an authorization token for a particular service, that can be saved and used for accessing that service on behalf of the user. Services are identified by proprietary service names, for example 'cl' for Google Calendar and 'ah' for Google App engine. A (non-exhaustive) list of supported service names can be found in the Google Data API reference. Here are a few Android-specific ones, not listed in the reference: 'ac2dm', 'android', 'androidsecure', 'androiddeveloper', 'androidmarket' and 'youngandroid' (probably for the discontinued App Inventor). The token can be fairly long-lived (up to two weeks), but cannot be refreshed and the application needs to obtain a new token when it expires. Additionally, there is no way to validate the token short of accessing the associated service: if you get an OK HTTP status (200), it is still valid, if 403 is returned you need to consult the additional error code and retry or get a new token. Another limitation is that ClientLogin tokens don't offer fine grained access to a service's resources: access is all or nothing, you cannot specify read-only access or access to a particular resource only. The biggest drawback for use in mobile apps though is that ClientLogin requires access to the actual user password. Therefore, if you don't want to force users to enter it each time a new token is required, it needs to be saved on the device, which poses various problems. As we saw in the previous post, in Android this is handled by GLS and the associated online service by storing an encrypted password or a master token on the device. Getting a token is as simple as calling the appropriateAccountManger method, which either returns a cached token or issues an API request to fetch a fresh one. Despite it's many limitations, the protocol is easy to understand and straightforward to implement, so it has been widely used. It has been officially deprecated since April 2012 though, and apps using it are encouraged to migrate to OAuth 2.0, but this hasn't quite happened yet. OAuth 2.0
The OAuth 2.0 specification defines 4 basic flows for getting an authorization token for a resource, and the two ones that don't require the client (in our scenario an Android app) to directly handle user credentials (Google account user name and password), namely the authorization code grant flow and the implicit grant flow, both have a common step that needs user interaction. They both require the authorization server (Google's) to authenticate the resource owner (the user of the our Android app) and establish whether they grant or deny the access request for the specified scope (e.g., read-only access to profile information). In a typical Web application that runs in a browser, this is very straightforward to do: the user is redirected to an authentication page, then to a access grant page that basically says 'Do you allow app X to access data Y and Z?', and if they agree, another redirect, which includes an authorization token, takes them back to the original application. The browser simply needs to pass on the token in the next request to gain access to the target resource. Here's an official Google example that uses the implicit flow: follow this link and grant access as requested to let the demo Web app display your Google profile information. With a native app things are not that simple. It can either
- use the system browser to handle the permission grant step, which would typically involve the following steps:
- launch the system browser and hope that the user will finish the authentication and permission grant process
- detect success or failure and extract the authorization token from the browser on success (from the window title, redirect URL or the cookie store)
- ensure that after granting access, the user ends up back in your app
- finally, save the token locally and use it to issue the intended Web API request
- embed a
WebViewor a similar control in the apps's UI. Getting a token would generally involve these steps: - in the app's UI, instruct the user what to do and load the login/authorization page
- register for a 'page loaded' callback, and check for the final success URL each time it's called
- when found, extract the token from the redirect URL or the
WebView's cookie jar and save it locally - finally use the token to send the intended API request
redirect_uri is set to http://localhost in the API console, so you can't just use a custom scheme). The second one is generally preferable, if not pretty: here's an (somewhat outdated) overview of what needs to be done and a more recent example with full source code. This integration complexity and UI impedance mismatch are the problems that OAuth 2.0 support via the AccountManager initially, and recently Google Play Services aim to solve. When using either of those, user authentication is implemented transparently by passing the saved master token (or encrypted password) to the server side component, and instead of a WebView with a permission grant page, you get the Android native access grant dialog. If you approve, a second request is sent to convey this and the returned access token is directly delivered to the requesting app. This is essentially the same flow as for Web applications, but has the advantages that it doesn't require context switching from native to browser and back, and is much more user friendly. Of course, it only works for Google accounts, so if you wanted to write, say, a Facebook client, you still have to use a WebView to process the access permission grant and get an authorization token.Now that we have an idea what authentication methods are available, let's see if we can use them to access an online Google service that doesn't have a dedicated API.
Google Web properties single sign-on
- Case 1: you haven't authenticated to any of the Google properties. If you access, for example,
mail.google.comin that state you will get a login screen originating athttps://accounts.google.com/ServiceLoginwith parameters specifying the service you are trying to access ('mail' for Gmail) and where to send you after you are authenticated. After you enter your credentials, you will generally get redirected a few times around theaccounts.google.com, which will set a few session cookies, common (Domain=.google.com) for all services (always SID and LSID, plus a few more). The last redirect will be to the originally requested service and include an authentication token in the redirected location (usually specified with theauthparameter, e.g.:https://mail.google.com/mail/?auth=DQAAA...). The target service will validate the token and set a few more service-specific sessions cookies, restricted by domain and path, and with theSecureandHttpOnlyflags set. From there, it might take a couple of more redirects before you finally land at an actual content page. - Case 2: you have already authenticated to at least one service (Gmail in our example). In this state, if you open, say, Calendar, you will go through
https://accounts.google.com/ServiceLoginagain, but this time the login screen won't be shown. The accounts service will modify your SID and LSID cookies, maybe set a few new ones and finally redirect you the original service, adding an authentication token to the redirect location. From there the process is similar: one or more service-specific cookies will be set and you will finally be redirected to the target content.
Logging in using AccountManager
- Get a ClientLogin token (this we can do via the
AccountManager) - Pass it to
https://www.google.com/accounts/IssueAuthToken, to get a one-time use, short-lived token that will authenticate the user to any service (the so called, 'ubertoken') - Finally, pass the ubertoken to
https://www.google.com/accounts/TokenAuth, to exchange it for the full set of browser cookies we need to do SSO
- To get the mythical ubertoken, you need to pass the SID and LSID cookies to the
IssueAuthTokenendpoint like this:https://www.google.com/accounts/IssueAuthToken?service=gaia&Session=false&SID=sid&LSID=lsid
- The response will give you the ubertoken, which you pass to the
TokenAuthendpoint along with the URL of the service you want to use:https://www.google.com/accounts/TokenAuth?source=myapp&auth=ubertoken&continue=service-URL
- If the token check out OK, the response will give you a URL to load. If your HTTP client is set up to follow redirects automatically, once you load it, needed cookies will be set automatically (just as in a browser), and you will finally land on the target site. As long as you keep the same session (which usually means the same HTTP client instance) you will be able to issue multiple requests, without needing to go through the authentication flow again.
The hard way
AccountManager can only give us authentication tokens, and not cookies, this might seem like a hopeless catch-22 situation. However, while browsing the authtokens table of the system's accounts database earlier, we happened to notice that it actually had a bunch of tokens with type SID and LSID. Our next step is, of course, to try to request those tokens via the AccountManager interface, and this happens to work as expected:String sid = am.getAuthToken(account, "SID", null, activity, null, null)
.getResult().getString(AccountManager.KEY_AUTHTOKEN);
String lsid = am.getAuthToken(account, "LSID", null, activity, null, null)
.getResult().getString(AccountManager.KEY_AUTHTOKEN);
Having gotten those, the rest is just a matter of issuing two HTTP requests (error handling omitted for brevity):
String TARGET_URL = "https://play.google.com/apps/publish/v2/";
Uri ISSUE_AUTH_TOKEN_URL =
 Uri.parse("https://www.google.com/accounts/IssueAuthToken?service=gaia&Session=false");
Uri TOKEN_AUTH_URL = Uri.parse("https://www.google.com/accounts/TokenAuth");

String url = ISSUE_AUTH_TOKEN_URL.buildUpon().appendQueryParameter("SID", sid)
     .appendQueryParameter("LSID", lsid)
     .build().toString();
HttpPost getUberToken = new HttpPost(url);
HttpResponse response = httpClient.execute(getUberToken);
String uberToken = EntityUtils.toString(entity, "UTF-8");
String getCookiesUrl = TOKEN_AUTH_URL.buildUpon()
     .appendQueryParameter("source", "android-browser")
     .appendQueryParameter("auth", authToken)
     .appendQueryParameter("continue", TARGET_URL)
     .build().toString();
HttpGet getCookies = new HttpGet(getCookiesUrl);
response = httpClient.execute(getCookies);

CookieStore cookieStore = httpClient.getCookieStore();
// check for service-specific session cookie
String adCookie = findCookie(cookieStore.getCookies(), "AD");
// fail if not found, otherwise get page content
String responseStr = EntityUtils.toString(entity, "UTF-8");
This lets us authenticate to the Android Developer Console (version 2) site without requiring user credentials and we can easily proceed to parse the result and use it in a native app (warning: work in progress!) from here. The downside is that for this to work, the user has to grant access twice, for two cryptically looking token types (SID and LSID).
Of course, after writing all of this, it turns out that the stock Android browser already has code that does it, which we could have used or at least referenced from the very beginning. Better yet, this find leads us to an yet easier way to accomplish our task.
The easy way
'weblogin:'. If you use it along with the service name and URL of the site you want to access, it will do all of the steps listed above automatically and instead of a token will give you a full URL you can load to get automatically logged in to your target service. This magic URL is in the format shown below, and includes both the ubertoken and the URL of the target site, as well as the service name (this example is for the Android Developer Console, line is broken for readability):https://accounts.google.com/MergeSession?args=service%3Dandroiddeveloper%26continue
%3Dhttps://play.google.com/apps/publish/v2/&uberauth=APh...&source=AndroidWebLogin
Here's how to get the
MergeSession URL:String tokenType = "weblogin:service=androiddeveloper&"
+ "continue=https://play.google.com/apps/publish/v2/";
String loginUrl = accountManager.getAuthToken(account,tokenType, false, null, null)
.getResult().getString(AccountManager.KEY_AUTHTOKEN);
This is again for the Developer Console, but works for any Google site, including Gmail, Calendar and even the account management page. The only problem you might have is finding the service name, which is hardly obvious in some cases (e.g., 'grandcentral' for Google Voice and 'lh2' for Picasa).
It takes only a single HTTP request form Android to get the final URL, which tells us that the token issuing flow is implemented on the server side. This means that you can also use the Google Play Services client library to issue a
weblogin: 'token' (see screenshot below and note that unlike for OAuth 2.0 scopes, it shows the 'raw' token type). Probably goes without saying, but it also means that if you happen to come across someone's accounts.db file, all it takes to log in into their Google account(s) is two HTTPS requests: one to get the MergeSession URL, and one to log in to their accounts page. If you are thinking 'This doesn't affect me, I use Google two-factor authentication (2FA)!', you should know that in this case 2FA doesn't really help. Why? Because since Android doesn't support 2FA, to register an account with the AccountManager you need to use an application specific password (Update: On ICS and later, GLS will actually show a WebView and let you authenticate using your password and OTP. However, the OTP is not required once you get the master token). And once you have entered one, any tokens issued based on it, will just work (until you revoke it), without requiring entering an additional code. So if you value your account, keep your master tokens close and revoke them as soon as you suspect that your phone might be lost or stolen. Better yet, consider a solution that lets you wipe it remotely (which might not work after your revoke the tokens, so be sure to check how it works before you actually need it).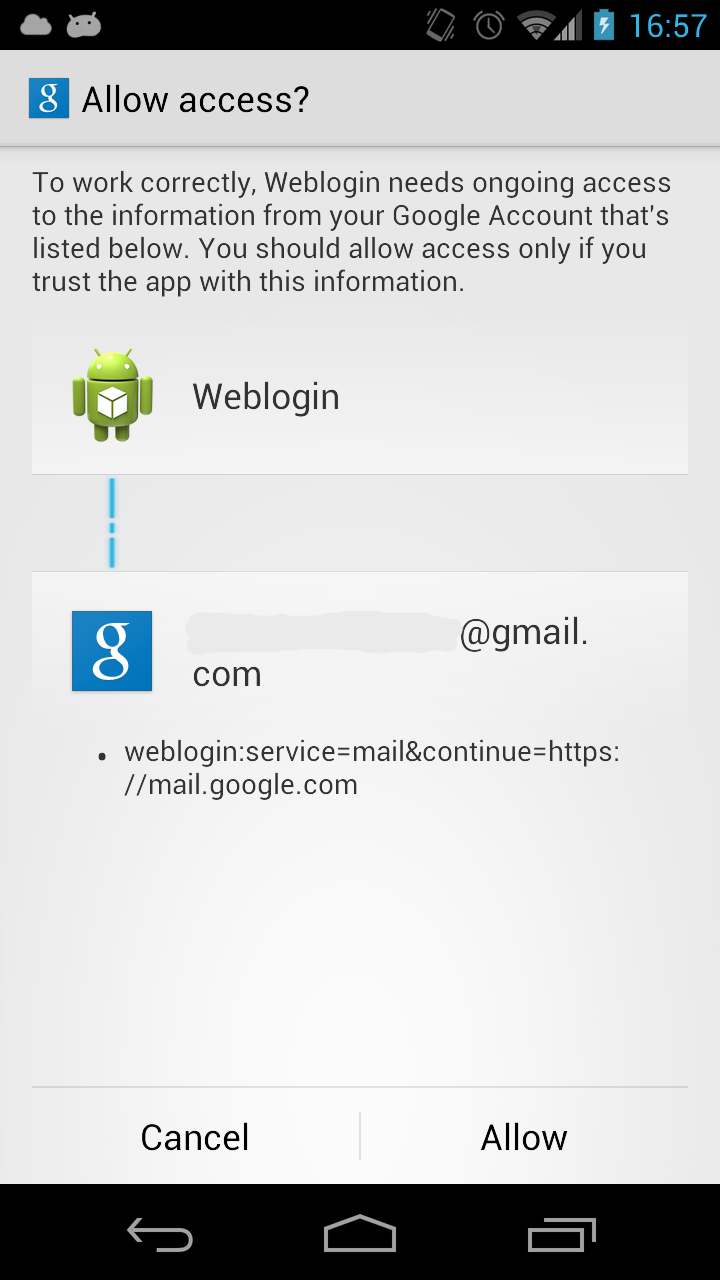
As we mentioned above, this is all ClientLogin based, which is officially deprecated, and might be going away soon (EOL scheduled for April 2013). But some of the Android Google data sync feeds still depend on ClientLogin, so if you use it you would probably OK for a while. Additionally, since the
weblogin: implementation is server-based, it might be updated to conform with the latest (OAuth 2.0-based?) infrastructure without changing the client-side interface. In any case, watch the Android Browser and Chormium code to keep up to date.Summary
Google offers multiple online services, some with both a traditional browser-based interface and a developer-oriented API. Consequently, there are multiple ways to authenticate to those, ranging from form-based username and password login to authentication API's such as ClientLogin and OAuth 2.0. It is relatively straightforward to get an authentication token for services with a public API on Android, either using Android's nativeAccountManager interface or the newer Google Play Services extension. Getting the required session cookies to login automatically to the Web sites of services that do not offer an API is however neither obvious, nor documented. Fortunately, it is possible and very easy to do if you combine the special 'weblogin:' token type with the service name and the URL of the site you want to use. The best available documentation about this is the Android Browser source code, which uses the same techniques to automatically log you in to Google sites using the account(s) already registered on your device.Moral of the story: interoperability is so much easier when you control all parties involved.
Android online account management
Our recent posts covered NFC and the secure element as supported in recent Android versions, including community ones. In this two-part series we will take a completely different direction: managing online user accounts and accessing Web services. We will briefly discuss how Android manages user credentials and then show how to use cached authentication details to log in to most Google sites without requiring additional user input. Most of the functionality we shall discuss is hardly new -- it has been available at least since Android 2.0. But while there is ample documentation on how to use it, there doesn't see to be a 'bigger picture' overview of how the pieces are tied together. This somewhat detailed investigation was prompted by trying to develop an app for a widely used Google service that unfortunately doesn't have an official API and struggling to find a way to login to it using cached Google credentials. More on this in the second part, let's first see how Android manages accounts for online services.
Android account management
AccountManager class which, quote: 'provides access to a centralized registry of the user's online accounts. The user enters credentials (user name and password) once per account, granting applications access to online resources with "one-click" approval.' You should definitely read the full documentation of the class, which is quite extensive, for more details. Another major feature of the class is that it lets you get an authentication token for supported accounts, allowing third party applications to authenticate to online services without needing to handle the actual user password (more on this later). It also has a whole of 5 methods that allow you to get an authentication token, all but one with at least 4 parameters, so finding the one you need might take some time, with yet some more to get the parameters right. It might be a good idea to start with the synchronous blockingGetAuthToken() and work your way from there once you have a basic working flow. On some older Android versions, the AccountManager would also monitor your SIM card and wipe cached credentials if you swapped cards, but fortunately this 'feature' has been removed in Android 2.3.4.The
AccountManager, as most Android system API's, is just a facade for the AccountManagerService which does the actual work. The service doesn't provide an implementation for any particular form of authentication though. It only acts as a coordinator for a number of pluggable authenticator modules for different account types (Google, Twitter, Exchange, etc.). The best part is that any application can register an authentication module by implementing an account authenticator and related classes, if needed. Android Training has a tutorial on the subject that covers the implementation details, so we will not discuss them here. Registering a new account type with the system lets you take advantage of a number of Android infrastructure services:- centralized credential storage in a system database
- ability to issue tokens to third party apps
- ability to take advantage of Android's automatic background synchronization
/data/system/accounts.db or /data/system/user/0/accounts.db on Jelly Bean and later for the first system user), that is only accessible to system applications, credentials are in no way encrypted -- that is left to the authentication module to implement as necessary. If you have a rooted device (or use the emulator) listing the contents of the accounts table might be quite instructive: some of your passwords, especially for the stock Email application, will show up in clear text. While the AccountManger has a getPassword() method, it can only be used by apps with the same UID as the account's authenticator, i.e., only by classes in the same app (unless you are using sharedUserId, which is not recommended for non-system apps). If you want to allow third party applications to authenticate using your custom accounts, you have to issue some sort of authentication token, accessible via one of the many getAuthToken() methods. Once your account is registered with Android, if you implement an additional sync adapter, you can register to have it called at a specified interval and do background syncing for you app (one- or two-way), without needing to manage scheduling yourself. This is a very powerful feature that you get practically for free, and probably merits its own post. As we now have a basic understanding of authentication modules, let's see how they are used by the system. As we mentioned above, account management is coordinated by the
AccountManagerService. It is a fairly complex piece of code (about 2500 lines in JB), most of the complexity stemming from the fact that it needs to communicate with services and apps that span multiple processes and threads within each process, and needs to take care of synchronization and delivering results to the right thread. If we abstract out the boilerplate code, what it does on a higher level is actually fairly straightforward:- on startup it queries the
PackageManagerto find out all registered authenticators, and stores references to them in a map, keyed by account type - when you add an account of a particular type, it saves its type, username and password to the
accountstable - if you get, set or reset the password for an account, it accesses or updates the
accountstable accordingly - if you get or set user data for the account, it is fetched from or saves to the
extrastable - when you request a token for a particular account, things become a bit more interesting:
- if a token with the specified type has never been issued before, it shows a confirmation activity asking (see screenshot below) the user to approve access for the requesting application. If they accept, the UID of the requesting app and the token type are saved to the
grantstable. - if a grant already exits, it checks the
authtokentable for tokens matching the request. If a valid one exists, it is returned. - if a matching token is not found, it finds the authenticator for the specified account type in the map and calls its
getAuthToken()method to request a token. This usually involves the authenticator fetching the username and password from theaccountstable (via thegetPassword()method) and calling its respective online service to get a fresh token. When one is returned, it gets cached in theauthtokenstable and then returned to the requesting app (usually asynchronously via a callback). - if you invalidate a token, it gets deleted from the
authtokenstable

Google account management
AccountManager, and a bunch of Google apps start getting tokens for the services they represent. Of course, all of this works with the help of an authentication provider for Google accounts. Since it plugs in the standard account management framework, it works by registering an authenticator implementation and using it involves the sequence outlined above. However, it is also a little bit special. Three main things make it different:- it is not part of any particular app you can install, but is bundled with the system
- a lot of the actual functionality is implemented on the server side
- it does not store passwords in plain text on the device
Google provides a multitude of online services (not all of which survive for long), and consequently a bunch of different methods to authenticate to those. Android's Google Login Service, however doesn't call those public authentication API's directly, but via a dedicated online service, which lives at
android.clients.google.com. It has endpoints both for authentication and authorization token issuing, as well as data feed (mail, calendar, etc.) synchronization, and more. As we shall see, the supported methods of authentication are somewhat different from those available via other public Google authentication API's. Additionally, it supports a few 'special' token types that greatly simplify some complex authentication flows.All of the above is hardly surprising: when you are dealing with online services it is only natural to have as much as possible of the authentication logic on the server side, both for ease of maintenance and to keep it secure. Still, to kick start it you need to store some sort of credentials on the device, especially when you support background syncing for practically everything and you cannot expect people to enter them manually. On-device credential management is one of the services GLS provides, so let's see how it is implemented. As mentioned above, GLS plugs into the system account framework, so cached credentials, tokens and associated extra data are stored in the system's
accounts.db database, just as for other account types. Inspecting it reveals that Google accounts have a bunch of Base64-encoded strings associated with them. One of the user data entries (in the extras table) is helpfully labeled sha1hash (but does not exist on all Android versions) and the password (in the accounts table) is a long string that takes different formats on different Android versions. Additionally, the GSF database has a google_login_public_key entry, which when decoded suspiciously resembles a 1024-bit RSA public key. Some more experimentation reveals that credential management works differently on pre-ICS and post-ICS devices. On pre-ICS devices, GLS stores an encrypted version of your password and posts it to the server side endpoints both when authenticating for the first time (when you add the account) and when it needs to have a token for a particular service issued. On post-ICS devices, it only posts the encrypted password the first time, and gets a 'master token' in exchange, which is then stored on the device (in the password column of the accounts database). Each subsequent token request uses that master token instead of a password.Let's look into the cached credential strings a bit more. The encrypted password is 133 bytes long, and thus it is a fair bet that it is encrypted with the 1024-bit (128 bytes) RSA public key mentioned above, with some extra data appended. Adding multiple accounts that use the same password produces different password strings (which is a good thing), but the first few bytes are always the same, even on different devices. It turns out those identify the encryption key and are derived by hashing its raw value and taking the leading bytes of the resulting hash. At least from our limited sample of Android devices, it would seem that the RSA public key used is constant both across Android versions and accounts. We can safely assume that its private counterpart lives on the server side and is used to decrypt sent passwords before performing the actual authentication. The padding used is OAEP (with SHA1 and MGF1), which produces random-looking messages and is currently considered secure (at least when used in combination with RSA) against most advanced cryptanalysis techniques. It also has quite a bit of overhead, which in practice means that the GLS encryption scheme can encrypt at most 86 bytes of data. The outlined encryption scheme is not exactly military-grade and there is the issue of millions of devices most probably using the same key, but recovering the original password should be sufficiently hard to discourage most attackers. However, let's not forget that we also have a somewhat friendlier SHA1 hash available. It turns out it can be easily reproduced by 'salting' the Google account password with the account name (typically GMail address) and doing a single round of SHA1. This is considerably easier to do and it wouldn't be too hard to precompute a bunch of hashes based on commonly used or potential passwords if you knew the target account name.
Fortunately, newer version of Android (4.0 and later) no longer store this hash on the device. Instead of the encrypted password+SHA1 hash combination they store an opaque 'master token' (most probably some form of OAuth token) in the password column and exchange it for authentication tokens for different Google services. It is not clear whether this token ever expires or if it is updated automatically. You can, however, revoke it manually by going to the security settings of your Google account and revoking access for the 'Android Login Service' (and a bunch of other stuff you never use while you are at it). This will force the user to re-authenticate on the device next time it tries to get a Google auth token, so it is also somewhat helpful if you ever lose your device and don't want people accessing your email, etc. if they manage to unlock it. The service authorization token issuing protocol uses some device-specific data in addition to the master token, so obtaining only the master token should not be enough to authenticate and impersonate a device (it can however be used to login into your Google account on the Web, see the second part for details).
Google Play Services
com.google.android.gms, guess where the 'M' came from) was announced at this year's Google I/O as an easy to use platform that offers integration with Google products for third-party Android apps. It was actually rolled out only a month ago, so it's probably not very widely used yet. Currently it provides support for OAuth 2.0 authorization to Google API's 'with a good user experience and security', as well some Google+ plus integration (sign-in and +1 button). Getting OAuth 2.0 tokens via the standard AccountManager interface has been supported for quite some time (though support was considered 'experimental') by using the special 'oauth2:scope' token type syntax. However, it didn't work reliably across different Android builds, which have different GLS versions bundled and this results in slightly different behaviour. Additionally, the permission grant dialog shown when requesting a token was not particularly user friendly, because it showed the raw OAuth 2.0 scope in some cases, which probably means little to most users (see screenshot in the first section). While some human-readable aliases for certain scopes where introduced (e.g., 'Manage your taks' for 'oauth2:https://www.googleapis.com/auth/tasks'), that solution was neither ideal, nor universally available. GPS solves this by making token issuing a two-step process (newer GLS versions also use this process):- the first request is much like before: it includes the account name, master token (or encrypted password pre-ICS) and requested service, in the
'oauth2:scope'format. GPS adds two new parameters: requesting app package name and app signing certificate SHA1 hash (more on this later). The response includes some human readable details about the requested scope and requesting application, which GPS shows in a permission grant dialog like the one shown below. - if the users grants the permission, this decision is recorded in the
extrastable in a proprietary format which includes the requesting app's package name, signing certificate hash, OAuth 2.0 scope and grant time (note that it is not using thegrantstable). GPS then resends the authorization request setting thehas_permissionparameter to 1. On success this results in an OAuth 2.0 token and its expiry date in the response. Those are cached in theauthtokenstable in a similar format.

AccountManager API is that while its underlying authenticator modules (GLS and GSF) are part of the system, and as such cannot be updated without an OTA, GPS is an user-installable app that can be easily updated via Google Play. Indeed, it is advertised as auto-updating (much like the Google Play Store client), so app developers presumably won't have to rely on users to update it if they want to use newer features (unless GPS is disabled altogether, of course). This update mechanism is to provide 'agility in rolling out new platform capabilities', but considering how much time the initial roll-out took, it is to be seen how agile the whole thing will turn out to be. Another thing to watch out for is feature bloat: besides OAuth 2.0 support, GPS currently includes G+ and AdMob related features, and while both are indeed Google-provided services, they are totally unrelated. Hopefully, GPS won't turn into a 'everything Google plus the kitchen sink' type of library, delaying releases even more. With all that said, if your app uses OAuth 2.0 tokens to authenticate to Google API's, which is currently the preferred method (ClientLogin, OAuth 1.0 and AuthSub have been officially deprecated), definitely consider using GPS over 'raw' AccountManager access.Summary
AccountManager class. It lets you both get tokens for existing accounts without having to handle the actual credentials and register your own account type, if needed. Registering an account type gives you access to powerful system features, such as authentication token caching and automatic background synchronization. 'Google experience' devices come with built-in support for Google accounts, which lets third party apps access Google online services without needing to directly request authentication information from the user. The latest addition to this infrastructure is the recently released Google Play Services app and companion client library, which aim to make it easy to use OAuth 2.0 from third party applications.